...with Jenkins, typescript, jest, Jest-Cucumber on node.js
Assumption: Jenkins and NodeJs installed in your local machine.
Continuing with a previous post on BDD, this post is on using your GitHub repository as the SCM provider for Jenkins to build the scenario tests written using the Gherkin syntax of given, when, then and executing the tests, written in Typescript, using jest-cucumber on Node.Js!
The scenario is
The above scenario assumes that the features, written in Gherkin syntax, are uploaded to a GitHub repository (This one is named bdd-travis although this is a Jenkins example, because I had used this repository with travis so the name is so!)

and add a new NodeJs installation and your Jenkins page should like in the above screenshot.
Once the nodejs installation is complete, head to your project and select Configure to configure the GitHub repo details for Jenkins to process the Continuous Integration with the BDD repository.

and specify the GitHub repository URL.


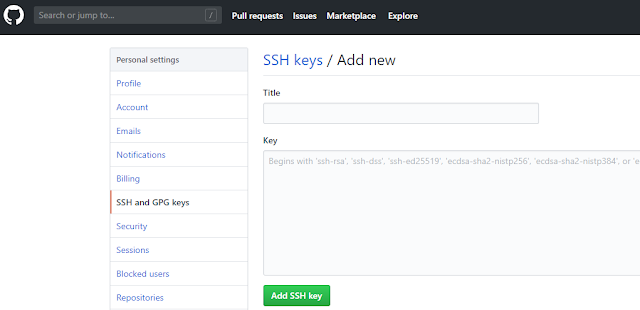
Enter your GitHub username and a private key. This private key is the SSH key that you could obtain from any SSH rsa 2 generator like Putty that will give you a public and private key.
Enter any passphrase that you may have created while generating the SSH key.
Next step is to add the SSH key in your GitHub repository.
Note: The above steps of adding the SSH key is optional if you are simply using your local machine.
Once everything is set, your Jenkins dashboard show up the files from the GitHub repository in the project workspace.


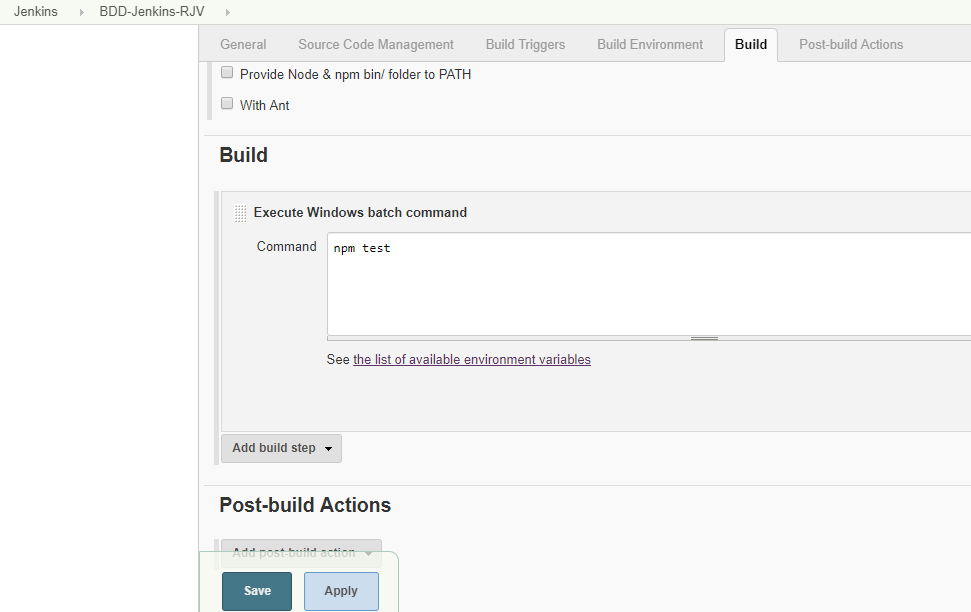
Type "npm test" into the textbox - the same command that you will use on your local NodeJs command prompt to run the Package.json test script and click Save.

Of course, for first time, you may want to run "npm install" to install all nodejs packages required by your GitHub repository.
Remember, the execution of the project will happen in your local machine (or the machine/Docker/Cloud storage where you have installed Jenkins).
Now, browse back to your project in Jenkins and click Build now.


Happy Automating BDD ! 😀😁😃
Assumption: Jenkins and NodeJs installed in your local machine.
Continuing with a previous post on BDD, this post is on using your GitHub repository as the SCM provider for Jenkins to build the scenario tests written using the Gherkin syntax of given, when, then and executing the tests, written in Typescript, using jest-cucumber on Node.Js!
The scenario is
- Your development and the business teams are located distributed across the world and you are managing the entire development process remotely.
- The development team waits for the BDD process to pass the requirements by runniing scenario tests to test the business rules.
- This post elaborates how to setup the BDD environment so that all features envisioned by the business owner are first tested with appropriate acceptance criteria and if the tests pass then the next phase, TDD, begins.
The above scenario assumes that the features, written in Gherkin syntax, are uploaded to a GitHub repository (This one is named bdd-travis although this is a Jenkins example, because I had used this repository with travis so the name is so!)
First step, is to tell Jenkins that you are going to build a NodeJs app.
Configure your Jenkins project to include a NodeJs plugin - Jenkins->Manage Jenkins -> Manage plugins and select the NodeJs plugin.
Once the plug in is installed, navigate to the Manage Jenkins page and click on Global Tools Config
Configure your Jenkins project to include a NodeJs plugin - Jenkins->Manage Jenkins -> Manage plugins and select the NodeJs plugin.
Once the plug in is installed, navigate to the Manage Jenkins page and click on Global Tools Config

and add a new NodeJs installation and your Jenkins page should like in the above screenshot.
Once the nodejs installation is complete, head to your project and select Configure to configure the GitHub repo details for Jenkins to process the Continuous Integration with the BDD repository.

and specify the GitHub repository URL.

Next step is to configure the access for Jenkins. Click on the Add button next to Credentials and select SSH username with password.

Enter any passphrase that you may have created while generating the SSH key.
Next step is to add the SSH key in your GitHub repository.

Note: The above steps of adding the SSH key is optional if you are simply using your local machine.
Once everything is set, your Jenkins dashboard show up the files from the GitHub repository in the project workspace.


Now to build the workspace.

Under the Build tab, select the Execute Windows batch command under Execute NodeJs Script. The check will let you know that there is a NodeJs installation in your Jenkins.

Of course, for first time, you may want to run "npm install" to install all nodejs packages required by your GitHub repository.
Remember, the execution of the project will happen in your local machine (or the machine/Docker/Cloud storage where you have installed Jenkins).
Now, browse back to your project in Jenkins and click Build now.

Once the progress bar completes, click the down arrow next to the build # and click Console output


The Jenkins workspace will now refresh itself with any changes made to the GitHub and so, as and when newer features are tested with scenario tests, Jenkins will run the tests.
So, as a remote product owner or a stakeholder, all you need to do is run the Jenkins build and check out the results and approve the new features.
And a remote development team, waiting to start its TDD process based on the passed (Approved features), would simply pick the baton and sprint towards its goal of delivering a marketable feature frequently and fully tested!
Happy Automating BDD ! 😀😁😃
No comments:
Post a Comment